Microsoft's Multi-factor Authentication
Microsoft’s Multi-factor Authentication (MFA) is a method of providing advanced security to verify your identity when you access State of Maine resources from outside of our network. With MFA, you prove who you are by responding to the Authenticator application, a phone call, or a physical token, to confirm your identity before you complete your login.
To use MFA, you first need to choose how you would like to respond to MFA requests when logging in.
Phone
There are 2 options using a phone:
- RECOMMENDED: Use an app on your phone. After setup, this will be the quickest and easiest option. It is recommended to set up this method and then also enter a phone number into the site as a backup.
- Receive a phone call that asks you to push a button on your phone
Physical device
If a phone is not an option, there is a physical device option that can be ordered via OIT. If you were provided a physical token, no setup is required. When prompted, just copy the code from the token into the computer.
The best practice is to have at least two methods of MFA. You can use any combination of methods outlined in this document. You will also need to be on the State of Maine network or connected via AnyConnect. If you are not, please read how to get connected without MFA. These instructions work best in Edge or Chrome, Internet Explorer does not work well for this setup.
Demonstration Video - How to Install and Configure MFA
https://web.microsoftstream.com/video/83f6ca37-5008-4de8-b1f5-6424d56853a1
Setting up MFA to Confirm with the Authenticator App
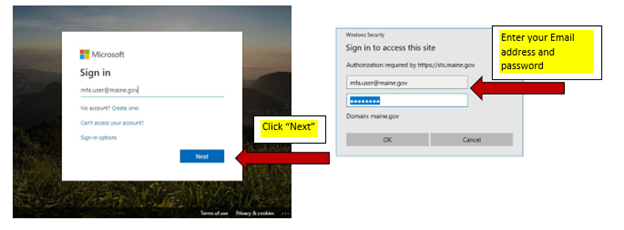
1. Go to https://aka.ms/mfasetup on your computer, enter your email address and password when prompted. If you get the “Windows Security” box enter your email in the top box and your computer password in the bottom box.
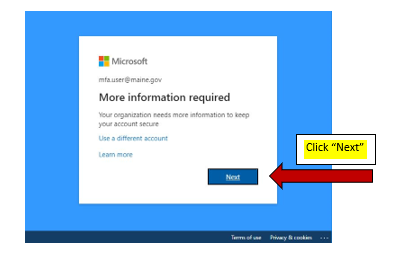
2. Click “Next” on the screen that shows “More information required”
3. On the cell phone you want to use for verification you will have to download the “Authenticator” app. On iPhone go to the App store and download this, on Android go to the Play store to download this. If you currently have state email access on the phone you will likely already have this application on your phone.
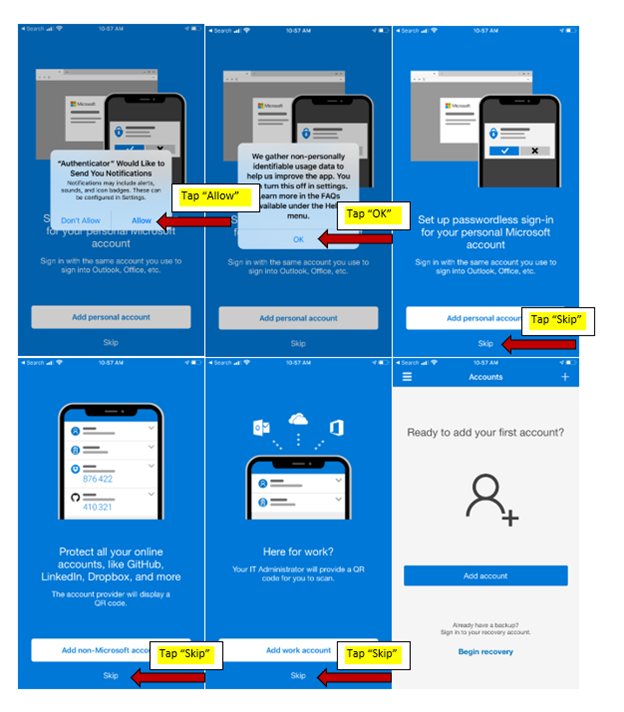
4. Open the Authenticator app, click “OK” on the screen with info about the app. Tap “Allow” when prompted to allow notifications, tap skip at the bottom until you get to the “Ready to add your first account?” screen.
 5. On the computer click “Next” on the next 2 screens.
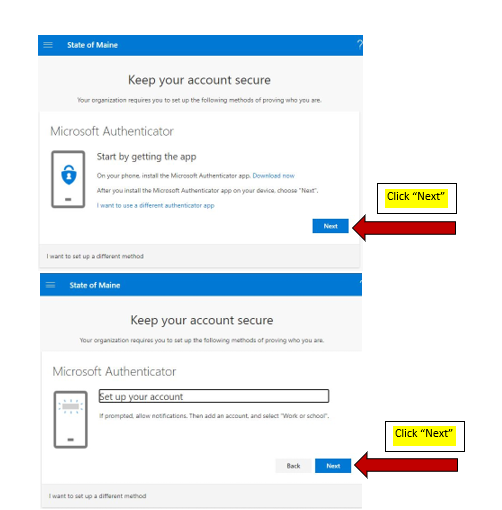
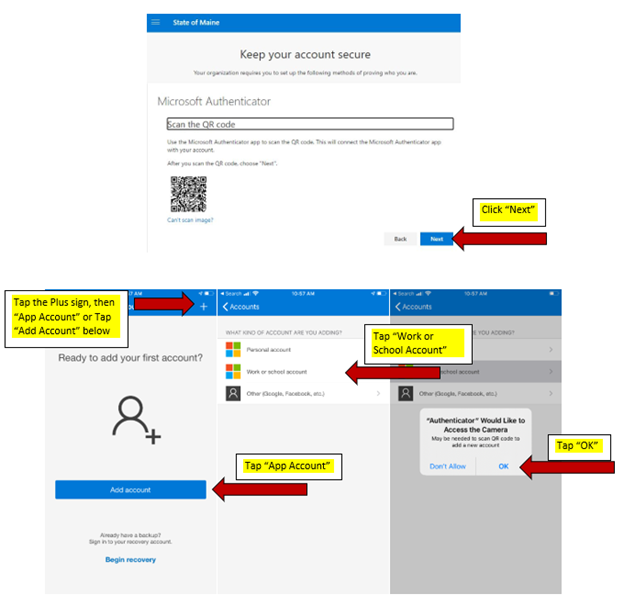
6. Once you have a QR code showing on the computer tap the “+” or “…” then “add account” on the top right of the Authenticator app on the phone. Choose “Work or school account” and then tap “OK” or “Allow” when asked to access the camera. Point the camera at the QR code on the computer screen.
7. On the computer choose “Next” you will then get a notification to your phone. Tap “Approve” on the notification.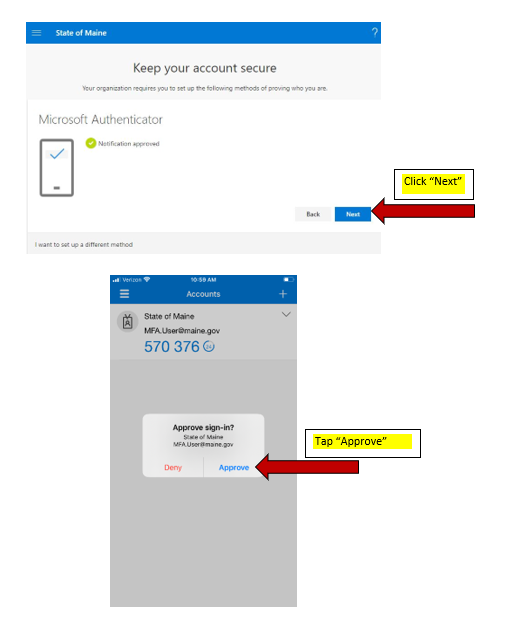
8. Click done. 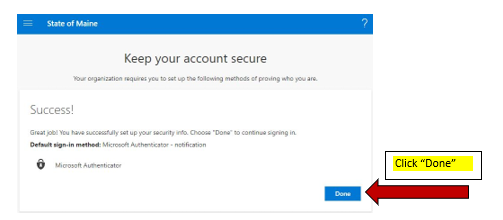
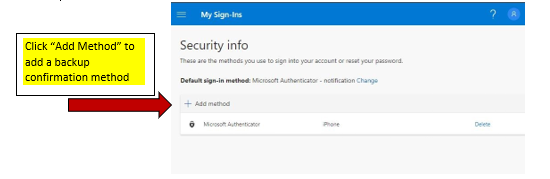
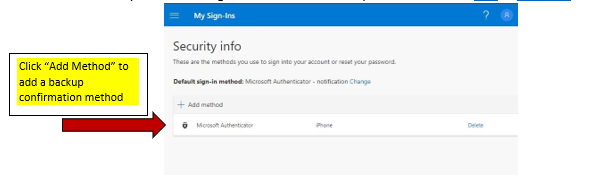
9. MFA is now ready to use. It is a good idea to set a phone number as a backup method.
Setting up MFA to Confirm with a Phone Call
1. Go to https://aka.ms/mfasetup on your computer, enter your email address and password when prompted. If you get the “Windows Security” box enter your email in the top box and your computer password in the bottom box. If you get a screen that says “More information required” go to step 2. 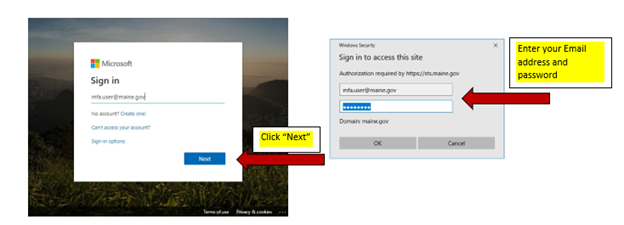
2. Click “Next” on the screen that shows “More information required” 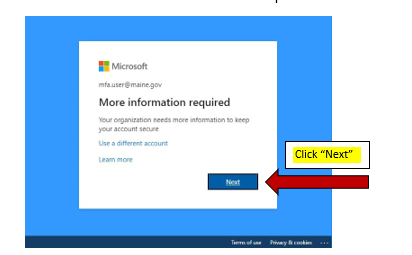
3. Click the link that says “I want to set up a different method” then choose “Phone” from the dropdown and click “Confirm” 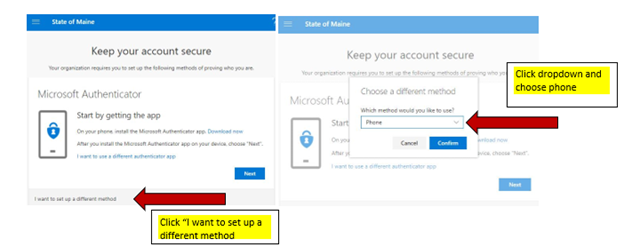
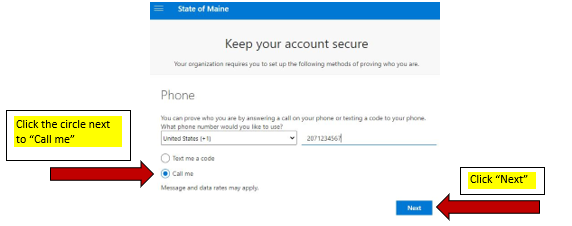
4. Click the circle next to “Call me” then click on the “Select your country or region” box and choose “United States +1” then fill out your full phone number with area code.
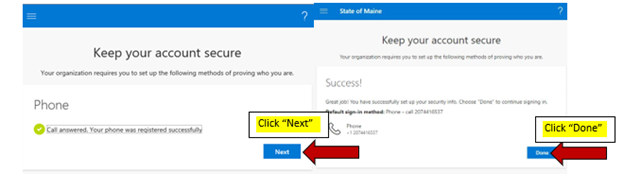
5. You will receive a call to the number indicated, answer the call and hit the # key when you are asked to on the call. Choose “Done” once the screen shows “Success!”
6. MFA is now ready to use. It is best to use calling as a backup and use the authenticator app as the primary source.